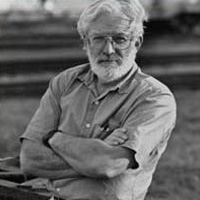
Bruce Barnbaum

Bruce Barnbaum

Member, Freestyle Advisory Board of Photographic Professionals

Biography

Bruce Barnbaum has been working in the photographic field for more that forty years, and is regarded and one of America's top master photographers and printers, in both black & white and color. His photography expands upon the dynamics he finds in both nature and the works of man, relating forces to the sweeping forms that dominate his vivid imagery. Long an advocate of both photography and environmentalism, Barnbaum has produced images which convey an intense love for the landscapes which have inspired him for decades, much in the same vein as the great Ansel Adams. An accomplished author, Barnbaum's internationally-acclaimed works include Visual Symphony, The Art Of Photography, Tone Poems - Books I & II, and more. He has also taught photographic workshops around the world, and founded the famous Owens Valley Photography Workshops, which enjoyed international acclaim from 1979 through 1990.

Ask The Experts

Dan, If you use a cold light head, variable contrast paper is difficult to work with because the cold light head is missing segments of the viual spectrum. Thus, moving from one contrast level to the next tends to be erratic. I believe youd do well to modify your enlarger to take the Omega Chromega head with dial-in filters, which will make working with variable contrast papers far easier. I also feel that variable contrast papers are equal to or better in quality than graded papers, and far more flexible beyond that (examples: allowing you to print different parts of an image at different contrast levels, or burning in areas at different contrast levels), so I strongly recommend using variable contrast papers...hence the further recommendation to get the Chromega head.

Shailendra, Rodinal s not really made for the T-grain films (i.e., Kodak T-Max or Ilford Delta films), and doesnt really do the best job of developing them to their potential. It sounds to me like the Jobo may be the roblem, but without knowing more about the direction of the motion of the Jobo drum and the direction that you place the film into the drum, I cannot be sure of that being the problem. Its possible you can experiment with diluting the T-Max developer in the Jobo and compensating for it by extending the development time, which could solve the problem in much the same way that you are thinking could be done with Rodinal. I think it would be worth trying. You could also try the Ilford Delta T-grain developers, if diluting T-Max RS fails to solve the problem.

Let me try my best to deal with your question: Hopefully you have a light meter-a reflective light meter, not an incident meter-to read the relative brightnesses of objects within the frame of your composition. Since I have no idea what those may be, I cannot tell you the exposure you need. As it turns out it doesn't matter who the subjects of the portraits are or what camera you're using to photograph them. It's the film and the light levels that count...and HP5+ is an excellent film. In general, meter the darkest thing in the composed frame where you want to see good detail (in both photographs). There may be even darker things in the frame, but if they don't matter much, just ignore them. Then meter the brightest thing that you feel demands tonal detail. See how many stops apart they are. Whatever is brighter than that, also ignore. Place the lower value in Zone 4...or one stop lower than it's meter reading, and expose it like that. If the bright value is above Zone 9, you may want to give the negative less than "normal" development to reduce the contrast. If the highlight is about where you'd want it, develop the negative "normal." If the highlight is too low (maybe Zone 6 or 7) you may want to give the negative more than normal development. I hope this helps. It's all laid out in my textbook "The Art of Photography." If you want to see about that book, look up my website at www.barnbaum.com for information.

Hi Joe, Not really a problem. If I expose it in Zone 7, then I expect to develop it to Zone 7 density. Period! Now, I may want to print it as Zone 6, and I can always do that by giving it more time under the enlarger. But the real crux of this issue is with the lower zones, not so much with the middle zones. I use a higher ASA simply because Zone 1 has no real meaning photogaphically (sensitometrically, yes; photographically, no!) It has too little density to separate itself from Zone 0, so I ignore it, as if it doesnt exist. (Its only importance is in the negative, where it begins the doubling of exposures to achieve higher zones, and therefore it has importance as a sensitometric starting point, but little photographic value.) Furthermore, since the initial zones are on the toe of the exposure/density curve, where density separations are so meager (meaning, of course, that print tonal separations are meager, as well), I want to largely ignore the toe of the curve, and get my exposures onto the straight line portion of the curve for better separations. By exposing at least one zone higher than the manufacturers recommendation I have a somewhat denser negative, but I enjoy far better tonal separations. So, when I place a value in, say, Zone 3, it is MY Zone 3, which is the manufacturers Zone 4. But its always MY Zone 3! So thats the density that I expect. Later, If I want to print it at Zone 3, I have good separation built in already because Im above the toe of the curve. I simply dont confuse My Zone 3 (on the negative) with the manufacturers Zone 3. Finally, I can do all this with confidence since the shoulder of the curve is way up there around Zone 14, 15, or even 16, and the upper limit on the negative is around Zone 16, 17, or 18. So, by placing the low zones higher, I still have a huge long way to go before I bump into any ceiling on negative exposure. Those who think that the negative has only 10 zones are afraid to use my approach because they feel that if they push things up one zone in the lower zones, theyll be jammed against the ceiling at the high end. But that ceiling is so much higher than they realize that theyre simply constricting their options and creative possibilities. I hope that helps.

Dan, Not a bit. If youve altered everything to accommodate the higher temperature, youre fine. Go forth and be fruitful and produce good prints!

Precisely! Just be sure to hold the film taught when loading the reel to avoid that problem. But really, if this was your first time doing this, and you lost only 1 frame, you did very well. When you load film more often, youll probably get it perfect every time (but expect the rare screw-up once in a while...were never quite perfect, are we?).

Pierre, To be perfectly honest, Ive never done any of the tests in my book appendix, myself (except for the safelight test). I created those tests as thought experiments for those who feel a need to test. I hate testing. But I have friends who are testers, and have told me that those tests yielded the best results theyve ever gotten. So I know theyre valid. Personally, Id rather shoot and adjust than test, and test, and test, ... That said, let me try to answer your questions I understand how test your film to determine the ASA, but to figure out your N development time you recommend exposing a grey card in Zone V using the manufacturers recommended ASA, not the ASA you just determined (Appendix A of The Art of Photography). Why is that ? Is it to guarantee that with the lowered ASA you use in the field youll get a little more exposure, which you can always print down under the enlarger ? Like I said, I never test. But I shoot and adjust as necessary. So the first part of your surmise (above) in incorrect, but the last part is correct. Also, I dont understand why you print this Zone V to match the same value as 18 gray. After all, many exposures can be made to look like 18 gray with the full texture you expect from a Zone V placement. Wouldnt you want to evaluate your Zones V, VIII and IX under the standard/maximum black exposure ? This would allow you to evaluate the print values for your Zone V (and higher zones) when youve printed your Zone 0 as a pure black. Thats what I would do if I really tested things. But I dont test. Generally I start by cutting the manufacturers ASA in half. Usually the results are real good. Sometimes, I find Im overexposing, so I push the ASA up a bit. The initial overexposures are still perfectly printable, while an equivalnet underexposure may not be. So I lose nothing with this approach, and I can get right directly to real shooting without the wasted time of testing. Thank you very much for your help ... I hope my answers—shocking as they may be—are of help to you. I created those tests in my book just by thinking of how Id test if I had to, and because I know there are lots of people who feel a need to test. I dont. I find it to be a waste of time. So I use the procedure I outlined above. The real issue is the feeling you can create through your imagery, not the exact ASA of your film/developer combination. I advise getting to the real issues as quickly and sensibly as possible. Testing is a waste of time...and boring, as well! If you have any further questions, please dont hesitate to write again.

Wilbert, After moving to France with my family, Im now building a teaching darkroom in a space of 14x20 feet. Ive learned a lot from your darkroom tour at lenswork. Could you tell me what the measures are of your darkroom sink, and how many people can comfortably work at it? My sink is 3 1/2 feet wide x 20 feet long (inside dimensions) and runs down the middle of my darkroom, allowing people to work on both sides of the sink simultaneously. Under those circumstances, I can get as many as 7 people working on printing simultaneously. (I probably could squeeze in 8, but I have only 7 enlargers, so thats the limit.) Generally I keep it limited to 6 people at a time, which proves to be no problem, whatsoever. I hope that helps you decide how to proceed with your plans.

Katie, Thank you for choosing me for your class project. Im honored! You can get a good deal of information about me from my website at www.barnbaum.com. Concerning my background in photography: it came rather late. My interest in photograph started in college, when I began backpacking, and taking some 35mm slide photographs of my hikes in the Sierra Nevada Mountains of California. Gradually my interest in photography grew to nearly equal that of hiking and enjoying the spectacular mountain landscape, itself. After getting a Masters degree in mathematics from UCLA, and working for 3 years as a computer programmer, I left that field entirely and jumped into photography. It was abrupt. It was, clearly, life-changing. It was the best move I ever made. I have no regrets. If you have any further questions to help you with your paper, please dont hesitate to write again. Good luck with your paper.

Nicole, Thank you for your good words about my work. You ask how I get my work to be so good, and of course there is no single answer to that question. Let me simply say it begins with knowing the subject matter that is important to you, knowing why it is important to you, and knowing what you want to say about it to the viewer. Then you have to understand light and composition, which are the cornerstones of all photography. Yes, some of my photographs involve extensive burning and dodging; others require very little. It depends on what I want to say. Finally, yes I do a lot of landscapes because the land means a great deal to me (and how we are destroying it bothers me immensely), and I love abstracts. And sometimes the land, itself, can be very abstract. The combination is wonderful. I hope that helps. If you have further questions, please don hesitate to ask. Bruce Barnbaum

Lynn, This is totally baffling. A contact print should be sharp as long as the contents (perhaps a negative, maybe a 3-D object of some sort) are truly in contact with the negative or print to be exposed. That should be sharp under any light, including even a standard light bulb on the ceiling controlled by a wall light switch. You don (or shouldn ) really need an enlarger to focus a contact print. Thus, it seems to me that the only possible explanation for an out-of-fucus contact image is simply lack of contact, but not the enlarger, itself.

Submit your question to Bruce Barnbaum